
LESSON 12: Casing & Shipping Illusions
CASING THE ILLUSION
After investing in your expensive illusion props, it is important to protect your investment by casing them properly. The most common way to case an illusion is with a ATA Case or Road Case,
ATA Flight/ Road Cases
ATA refers to Airline Transport Approved and a case has be “Air Transport Association Spec. 300 Category 1” compliant to be legitimately considered a true ATA case. However, loosely, ATA Cases or Flight Cases are referred to as the standard casing for many forms of equipment and are used extensively across countless industries. Non-ATA Cases are simply referred to as Road Cases and while they look the same, the specs may not ATA Spec 300 Cat 1 compliant.
At events, these type of cases will be a familiar sight as sound and lighting companies use flight/ road cases to house their audio, visual and lighting equipment.

A basic case has a lid and, most times, castors. The lid can be a pull-off lid or hinged. The castors are generally mounted on the smaller side of the case to take up less space during transport and storage.
Flight/ road cases are generally built to order and can be fabricated to house any piece of equipment of any shape and size. The cases are made from a core material (typically different thickness of ply wood, depending on the size of the case) and edged with aluminium components. The sides of the cases are finished with various kinds of laminate in different colours.
The core material of the ATA cases can also be made of ABS plastic, also known in the trade as Honeycomb or Astro board. This material is very strong yet lightweight but it will also double the cost of your case. The overall weight, however, will be about 45% lighter than a wood case
The case is assembled together with specialized aluminum hybrid parts and riveted together. Other component parts includes corner knuckles and latches. The insides of the case can be lined with foam or carpet for further protection. The case is usually finished with a tough plastic laminate of assorted colours.
The cases can be fabricated with a variety of features including pull-off, hinged lids, split lids, castors, shelves and pull-up trolley handles just to name a couple.
Over the last 16 years, I have ordered and custom-made over 40 flight, road and fiber cases for a variety of illusions, props and miscellaneous pieces of equipment. I have seen and worked with cases built by some of the world’s most reputable builders. I have also worked with cases that are just poorly built with the cheapest materials used.
The purpose of the flight case is simple. It is to protect your investment i.e. the illusion. Cases are meant to take the impact and abuse when a prop is being transport and shipped.
When I design an illusion, significant time and effort goes into designing how it breaks down and packs into a case. Chris Murphy (illusion builder from Australia, Oz Illusions) made a good point in his lecture notes. The goal and design should be to pack efficiently and not necessarily flat. However, I do think it does depend on which point in your career you are in.
When I first started with 2 – 3 illusions, I had to pack as flat as possible. This was purely due to practical reasons such as transport and storage. When packed completely flat, it would take up to 45 minutes to 60 minutes to unpack and set up the entire show.
However, as I evolved as an illusionist and the scale of my show grew, packing flat was not a primary concern. Transport was always handled by professional shipping companies and storage was not an issue. So now, I pack efficiently.
Where possible, the entire illusion rolls into its own case. As my average show might feature half a dozen illusions, I need to ensure unloading and set-up can be done as quickly as possible so that time can be spent on lighting design and rehearsals. If it is not practical for an illusion to be cased without breaking down, I design the illusion to pack down as efficiently and quickly as possible before it is cased.
An example would be my “Shadow Appearance” illusion that, when set up, stands at over 8ft high. Due, to the height, it would be impractical to have a case built that big to accommodate the entire prop.
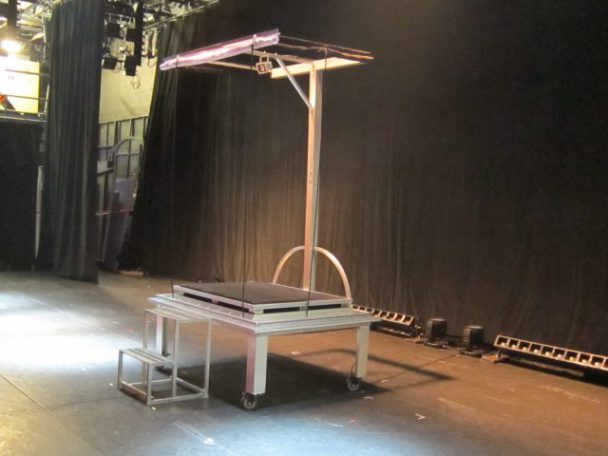
A case that large would also have a lot of empty wasted space. As shipping companies charge by volumetric weight; if shipping such a case, you are paying to ship air, which is a complete waste of money. The best solution is to have the prop pack efficiently and compact but not necessarily completely flat.

If you do a large touring show with dozens of illusions like Franz Harary or David Copperfield and play large theatres and arenas, most of the illusions will roll into its own case or directly into a shipping container or truck. With that many illusions and a tight schedule, it is not time and cost effective to have the props pack down, let alone flat.
Advanced Flight/ Road Cases
Some advanced case designs can have multiple sections and cases built into a single case.
An example is the custom case that I built for the “Windshear Illusion”. I designed the case to pack down efficiently so that it would take only 10 minutes to uncase and set up. The case has different sections to break apart and to store different parts of the illusion.


Another innovative design is the ramp case. There are several designs of such a case. This particular one was designed by Case Makers and it has an ingenious design where the lid converts to a ramp.
The ramp-lid can take the weight of a 100kg prop and allows just one person to unload/ load the illusion from the case.


Here are some considerations when designing a case to fit your illusion needs:
- Think how to break down your prop as efficiently as possible, yet take up as little space as possible without having the prop completely pack flat.
- Think how many people will be required to load/ unload the illusion and whether you have the manpower available.
- Always measure the widest parts of your illusion to calculate the internal dimensions of the case. These are the dimensions you will give the case maker. Do not forget protruding small parts such as bolts or castors. The finished case can easily be 3″ wider than the internal dimensions on each side. This takes account the thickness of the material and foam.
- Take into account the additional space required for castors to turn inside the case. This is often overlooked and after the prop is loaded into the case, it is almost impossible to remove it from the case because the castors cannot turn in the case. If the case is lined with foam, one solution is to cut out the foam just above the castors.
- It is best to consult your professional flight or road case maker to help design a case that best suit your needs.
Canvas & Poly Cases
If you transport your illusions yourself and they pack relatively small, flat and lightweight, there are two alternatives to an ATA case.
You can make custom canvas padded bags or polyfiber cases. A canvas case is very lightweight and offers waterproof protection as well protection against scratches, dents and dings. However, it will not offer substantial protection if you are shipping your props commercially through a shipping company.

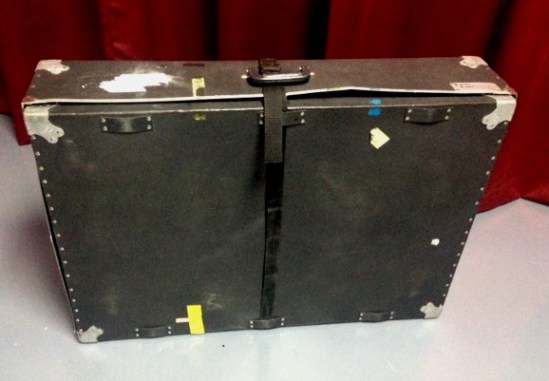
A poly fiber case can be seen as an in-between solution for a lightweight storage case. It will offer reasonable protect but is much lighter than an ATA case. However, there are only a handful of companies that manufacture this type of case. www.EncoreCases.com is one of the most recommended sources for this type of case.
HOW TO STORE & TRANSPORT ILLUSIONS
Now that you have thought about how to case your illusions, you also need to think of the very practical issues of storing and transporting your illusions. Your ability to store your illusions will determine the maximum size of the illusions that you can use. It will also determine how important packing flat your props are.
Here are some tips:
- If you are storing illusions at home or in a traditional office, besides physical space, you need to think about fitting the cases through standard doors or having to carry the cases up and down steps.
- If you have a storage unit, you might not have the same issues although corridors between indoor storage units can be narrow.
- Ensure there is a proper area for you to load and unload your illusions. If you have bigger props, you will want a storage location that has loading facilities like a ramp up loading dock or a hydraulic lift.
When I first started performing illusions, all my illusions had to pack flat as I would store them at home. A short time later, I rented my own office space to work from. It was a tiny 350 square foot office that still required me to own only illusions that could pack flat. I also transported the illusions myself in a taxi and later my car. The cases would fit in the boot and backseat of the car.
Subsequently, I moved to bigger facilities and now do not have my illusions break down. In most cases, my illusions roll into their cases assembled. My props are also transported by trucks and for international shows, professional shipping companies handle the consignment door to door.
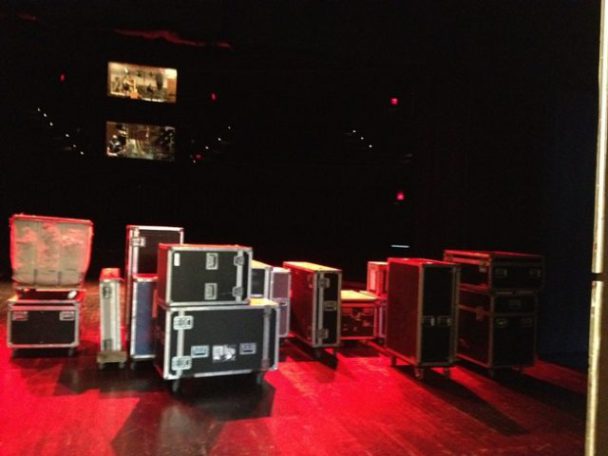
Besides storage, you will also need to think how you will be transporting your illusions. Some options available to you include:
- Transporting it yourself in your car. This may be done with the help of your assistant and/ or your stage crew, if you have any.
- Hiring a van or truck to transport the illusions. This may be done with the help of your assistant and/ or your stage crew, if you have any.
- Hiring a transport company to help you move your cargo. This is convenient but may not be inexpensive.
While illusionists tend to get top billing in a show, you might also be the artiste that has to arrive the earliest to set up and the last to leave due to breaking down and moving out your props.
Storage and transportation is really the most unglamorous part about doing illusions. But it is a necessary evil. Clients perceive you have a high value due to your illusions and scale, but storing and transporting illusions is a necessary chore.
Freight Forwarding the Illusions
Given security restrictions and high costs of fuel surcharges, checking in large ATA cases as excess baggage is not practical. The alternative is to freight forward the illusions by air or sea.
Whether you are freight forwarding your equipment whether by land, air or sea, there is essentially only one way to pack your gear and that is with hard shell cases for smaller props or ATA cases for large props & illusions.
As the cases are not handled by you but by multiple hands at different points of the journey, you have to pack your props even more securely with added protection.
Here are some tips when moving your equipment through a freight forwarder:
- Wrap all loose parts tightly with bubble wrap or cloth and pad all props and large parts with foam and sponge.
- Any case (with contents) that weighs more than 35kg (approx. 77 lbs) should have castors that lock and should be labeled as ‘heavy’ and ‘fragile’.
- Buy insurance against lost or damage of your gear. Even with 10mm-thick ATA cases, errant cargo handlers can pierce your case and contents with a forklift
- Ensure that you have all your proper documentation in order. This includes invoices of your equipment, detailed shipping manifests and Carnet applications or other tax-exemption forms. Be sure to clearly state that your gear is used equipment meant for performance only and not for export or resale.
- Label your cases so that the freight forwarders know that all the cases are in the same consignment. That is, if you have three cases, clearly label each case as ‘1 of 3’, ‘2 of 3’ and ‘3 of 3’.
- In order to ensure that there is little or no tax imposed on props, many performers will under declare the real value of the props. The danger is that if your prop is damaged, the insurance will only cover the declared value. So, it is a risk you have to take if you intend to under declare the true value of the shipment.
Always check with a professional freight forwarding agent on the protocol and documentation for your respective country and the country you are shipping too. Each country has its own rules on customs, temporary export permits and carnets.
You must apply (costs involved) for a temporary export permit or carnet to ensure your props do not get taxed when entering either destination.
An experienced shipping agent will be able to answer any questions you have. You will also want to seek at least three quotes for shipping to get the best price. Different agents have different arrangements with counterparts in other countries so rates can vary.
Regardless of who you ship with or how you ship, you will need to prepare a commercial invoice/ shipping manifest to accompany the cargo. You usually have to supply 3 copies when freight forwarding equipment.
You can download a sample commercial invoice in the Downloads area of this lesson plan.
DOWNLOADS
Sample Commercial Invoice that is Required for International Freight Forwarding (Air, Sea, Land)

